Video Editing

Basics of Multi-Camera Editing
Video Editing

The Basics of Multi-Camera Editing

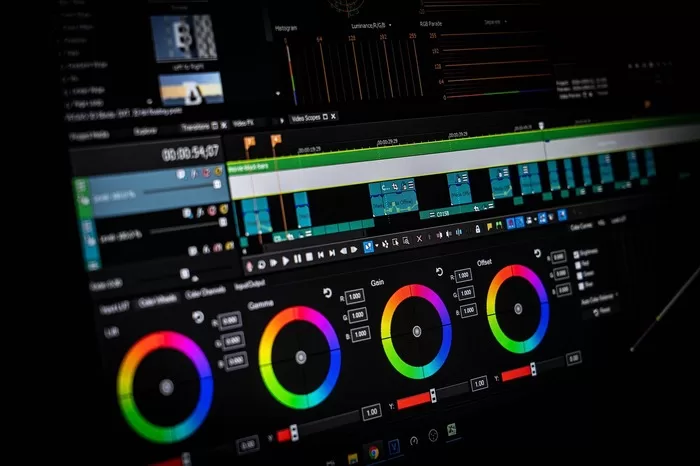
The Basics of Multi-Camera Editing The most basic video editing technique that is adopted by television, film, live events, and corporate video productions around the world is multi-camera editing. Understanding the basics of multi-camera editing enhances the editing of a concert or a talk show, a wedding video, among others. Here is the basic understanding, tools, and techniques needed for this discipline. What is Multi-Camera Editing? Multi-camera editing is recording a scene or action using more than one camera, synchronizing, and then editing the captured footage. It is also used when the need for the same event or scene to be recorded from various angles arises. For example, A concert would include close-up shots of musicians, wide shots of the stage, and reactions from the audience. It might include close-up shots of the host, reaction shots of the guest, and even a wide-angle view of both. There would probably be shots of how the bride and groom are responding in a wedding video, general wide shots of the ceremony happening, and possibly close-up and detailed shots of the decorations involved. This will easily switch in between each of these views for it to create the most dynamic product at the end. Advantages of Multi-Camera Editing Efficiency: Such multiple-camera editing software won’t need to line up and cut between angles on the cameras which can save hours of work. Giving it a certain depth and emotion that a scene carries, and let’s you tell a richer story. Professional quality: A seamless angle transition gives it that great polished look of the cinema. Flexibility: Editors have many options of footage to choose from, which makes it easier to be flexible with the creative or technical needs. Important Tools for Multi-Camera Editing You must have video editing software that allows multi-camera editing to start working on multi-camera editing. The most popular versions include: 1.Adobe Premiere Pro Highly developed multi-camera tools in Adobe Premiere Pro means that users can synchronize footage either by using time code, audio waveforms or manually. So, its user interface is quite smooth and loved by professionals. 2.Final Cut Pro Apple’s Final Cut Pro also offers multi-camera editing with automatic sync and real-time angle change. 3.DaVinci Resolve This software is extremely popular for color grading and supports multi-camera editing, so it is also a good editor. 4.Avid Media Composer Avid is the leader in film and television production, and this company provides advanced multi-camera editing features to large-scale productions. 5.Sony Vegas Pro Another good option is Sony Vegas Pro, which has user-friendly multi-camera editing tools ideal for beginners as well as professionals. Steps to Master Multi-Camera Editing Step 1: Plan Your Shoot The shoot lays the foundation of a successful multi-camera edit. Here are some things to note: Use similar cameras: For the most part, use identical cameras and ensure that the settings are all exactly the same from one camera to another to preserve quality and the color grade of video Sync settings: Cameras have frame rate, resolution, white balance and all those features are nearly set alike Time code synchronization: Time code locks all your footage when recording on location. Clap or Slate: Clap or a slate at the head of every recording will do just fine for later synchronization. Step 2. Import and organize the footage Import all your varied footages once you have assembled them. Save your files in the order of camera angles or scenes, and you should structure these in an arrangement that would ease cutting. There are provisions about the right nomenclature convention and metadata so you do not waste time when cutting the footages. Step 3: Sync Footage Multi-camera editing is a technique based on syncing footage. Here are a few common ways to do so:. Time code: If your cameras are recording timecode, you can sync the footage automatically. Audio Waveforms: Most editing software can analyze audio tracks from various cameras and synchronize them based on waveforms. Manual Synchronization: You can also sync the video or audio markers of your clips by aligning them by some sort of common marker like clap or flash in case you did not use above methods. Step 4: Multi-Camera Sequence Create a multi-camera sequence in the editing software where you matched up the clips. This lets you cut between angles in real-time from one timeline. Step 5: Let’s Begin to Edit Multi-camera editing workflow differs from every other type of editing. Therefore, here’s what you will do: Preview All Angles: You go through footage of the other camera angles, picking on the best of yours. Switching in Real-Time: You’d preview your video playback within a multi-camera edit mode of the software and change angles either with click or via keyboard shortcuts. Refine Transitions: When you pass the second time through, review your cuts to make sure you are refining transitions so that the edit is smooth. Step 6: Effects and Adjustments Now that you have done your basic edits, let’s add effects and adjustments: Color Grading: Ensure that there is consistent color in all the angles. Audio mixing: balance all your audio levels as well as synch all external audio tracks. Graphics and titles: Lower thirds, transitions, graphics elements. Step 7: Export Final Product Save your edited file in the correct format to it and at suitable resolution. Then test on other devices for the quality and compatibility. Some Tips on Effectively Using Multi-Camera Editing Cut on Action: Change angles where action is involved, so one would be carried on. Shoot reaction shots along with the interviews or conversations as much as needed. Use of Wide Shots Rare: The wide shots are setting shots. If wide shots are heavily used, that may look somewhat static. The usage of all close-up shots, medium shot and wide should be balanced accordingly. Think about the Audience: Reflect on what kind of emotions or reactions you would want to elicit from your viewers for each angle. Keyboard Shortcuts: Learn your editing software keyboard shortcuts. That is the shortcut

Niutux - Video Editing Tips for Social Media Content
Video Editing

Video Editing Tips for Social Media Content

Video Editing Tips for Social Media Content Video content was promoted by such giants as Instagram, TikTok, YouTube, Facebook, and LinkedIn that had shown that video could be one heck of an asset not just for your audience but as an excellent source of traffic generation medium and hence becoming one integral means of increasing brand visibility within such a very short period. This means that many people get engaged only when taking shots that are related to the making of super videos than any other video within the feeds hyper-saturated with this form of content. All of it starts with great video editing, to be put first and foremost in terms of sharing polished, professional engaging content through social media. Here is your feasible video tutorial that will allow you to make an awesome, relevant video via social media, which people will connect. 1.Understand your platform and audience There are many social media websites that require varied formats and tastes of individuals in the masses. So with this factor kept in mind, before posting/updating the video, one needs to watch to know which is his/her favorite social media site. Instagram: Short and snappy with sweet visuals- In Reels, stories even in IGTV.   It is vertical orientation or 9: 16 aspect ratio for reels and stories. TikTok: Speed, trending, creative. Those good videos with quick cuts and audio and vertical shot videos also included in this category. Story, pacing, viewership retention for longer versions YouTube  Facebook: Allow short and long-duration videos. Optimize them if they are catchy with the captions for auto-play. LinkedIn: Very informative, very short videos. A very good medium for learning or business-based content.   Pay attention to what the platform requires of length, resolution, and aspect ratio of your video; this will make your content professional-looking and optimize for the intended audience. 2.Grab Their Attention Right Away Basically, all those short attentions while scrolling through people require that hook, right at the start; here is what tips point out in catching viewers on that bat. Start strong: Start with a stronger scene or question or maybe some bold statements. Value: Let viewers know how to give meaning to their time while watching it, either your video. Motion: fast cuts that thrill transitions or animations capture one instant of a person. Text Overlays: use bold text really drive the important points home. This is especially true in auto-play cases where the sound is muted. You communicate value and interest rapidly, and they stay. 3.Bite-Sized Videos For social media, though, the video needs to be shorter than for other applications. Here are some tips on keeping your audience hooked: Editing Ruthlessly: Get rid of unused footage, redundant clips, or slow-motion portions. It Has To Be Concise: One message or call to action per video. It Needs To Have Quick Flow: The video has to action and pace with cut rates, which makes use of the jump cuts and fast cuts technique. Recommended Length TikTok/Instagram Reels: 15-60 seconds Facebook/Instagram Stories: 10-15 seconds per story YouTube: Most social content: 3-10 minutes Cut the chaff and get to the wheat of the message in a few seconds, where the audience will continue paying attention. 4. Captions and subtitles Most of the viewers in social media like viewing with their volumes low, especially while viewing publicly. Caption ensures that the message reaches the audience even while they do not put their volume up or not. Accessibility: The video once captioned is accessible to all users having impairments about hearing. Tools to Use: Such Apps include; adding captions on videos less hassle with the likes of Kapwing, Canva and auto-caption feature from Adobe Premiere Pro. Don’t forget to make your captions readable and synchs up the content with your video; therefore, it will easily become watchable to others too. 5.Apply interesting graphics and transitions The first grounds to which the movie relies, without letting your attention stray aside, plus, which keeps it interesting for a video are its visuals. Some creative editing ideas with an appealing memory to your video are: Smooth transitions: One may achieve that using jump cuts, cross-fades and so on. Motion graphics: Add animated text, overlays, and graphics as an idea of highlighting stressed information. Color Grading: It is beautiful visually and well-complemented by brightening or darkening or even an improvement in contrast that should be enhanced visually Overusing split screens to make some comparative scenes and parallel running scenes There could be overdoing, with a resultant too many effects the viewers end up dizzy and lose the train 6.Mobile-friendly Most video content in the world is now streamed from smartphones. For that high percentage to access your video content, here are some of the best practices: Vertical or Square format: TikTok, Instagram Stories and Reels offers vertical 9:16. Fine 1:1 if your visuals and subject need to be snugly fitted on the screens of Facebook as well as for Instagram feed. Bold and Big Text sizes to be readable clearly again on your small screen too, Centralization: All your mandatory visualization, text or important point in shot must keep properly at the center. Test Playback: Your video editing check in your mobile too to ensure that’s a clear and resolution video which looks good as is for general viewing. Mobile Optimization makes a video nice to watch with fun thrills, and one would want to play with regardless of the screen size. 7.Audio Effects This gives life to a video, and emotionally, people can relate to your message. How to add audio elements to a video. Right Music: This sets mood and tone for your content. Audio and video synced: Action beat in cuts or transitions or key action. Will make that look super well-crafted Usage of SFX: Gentle some point on scenes with POP sounds, swooshes, and clicks etc. Trending audio tracks : Use the trending audio with Tiktok and reels making for what has seen them the most To create the content in which you are going

Edit Video like pro
Video Editing

How to Edit Video like a Pro on a Small Budget

How to Edit Video like a Pro on a Small Budget No matter what the quality of the equipment and software, however costly they are, needs to be utilized in editing videos professionally. A little creativity, resourcefulness, and all-smart strategy booting will do just fine. It could be you; be it a content creator or you own a small business or just cannot have enough video editing, the following article is going to provide that great head start to showing you how to edit your videos at no cost. Understanding What “Pro” Video Editing Is Before diving into the tools and techniques, let’s first understand what “professional” video editing is. Professional video editing means Seamless storytelling: Your video has a clear and engaging narrative.  High-quality visuals and audio: crisp footage with well-balanced sound.  Attention to detail: clean cuts, transitions, and polished effects.  Audience-centric approach: your content caters to the preference of your target audience. The good news? These goals do not have to break the bank. Basic Equipment for Low-Cost Video Editing 1.Low-Cost Editing Software You do not necessarily need to have professional-grade editing software. It can be very costly. Some of the available affordable ones are: DaVinci Resolve (Free): The free version of DaVinci Resolve is famous for its color correction and grading, with professional-grade tools without watermarks. HitFilm Express (Free): It is suitable for beginners and intermediate users as it has in-built effects and a user-friendly interface. Lightworks (Free): Pretty strong at its edit tools with intuitive timeline but the free option is bare-boned about export Filmora $49.99/year; includes drag-and-drop and motion tracking, and cool effects. iMovie Free; macOS and iOS. A completely free-to-the-user edit tool that allows users access to the App Store through Apple’s systems, meaning all of it’s pretty basic video-editing ability is included 2.Budget-Friendly Hardware This type of video editing is done and finished on low to medium machines. Some performance tips can be mentioned to achieve high return without wasting much money. Increasing RAM: Increases speed regarding the rendering and playback of media files Adding An SSD: It boosts up general performance as it changes a hard drive. Saving huge files in cloud, Google Drive or Dropbox and that will save the space of memory in computers. 3.Free Stock Resources Stock Footage Like Pexels, Pixabay, Videvo, all have free stock videos. Audio and Effects: YouTube Audio Library, Free Music Archive and Zapsplat, the website to get free sound effect royalty-free Animations and Overlays: can get titles and overlays absolutely free from Canva or PNG Tree The Simple Steps to Video Editing like a Pro 1.Planning of a Video Project Any video will look great only when preparation is done. This is what needs to be prepared before attempting an edit. Define a Storyline: Use Storyboards or Write a Screenplay to Organize a Stream of Thoughts. Know your audience: Style, pacing, and visuals should be designed for your target audience. Collect your assets: All your footage, images, music, and other assets in one place. 2.Organize Your Timeline A well-planned timeline is the solid base for great editing. To achieve that: Group similar clips in one section: All the interview clips, for instance Label and color-code your tracks: Audio, video, and special effects need labels Cut out unneeded footage: Eliminate dead air, shaky footages, and other non-essential parts early 3.Master Basic Editing Techniques On a very tight budget, these core techniques will already give your edits a good lift. Trimming and Cutting : Removing unwanted parts of footage with clean cuts. Transitions : Use simple transitions like fade or dissolve so the scene changes are smooth. Adjust Speed : Making slow motion and time-lapse effects on moments so emphasis is added. Audio Syncing : Syncing the dialogue and sound effects into the visuals 4.Highlighting Sound Design Audio breaks or makes a video. Here’s how it could be made professional. Background Music: Sets mood with royalty-free tracks. Noise Reduction: Eliminates background noise through native DaVinci Resolve or Audacity software. Audio Levels: The music, dialogue, and effects are all well-balanced, and no one drowns the other out. 5.Improve the Images Even with a shoestring budget, these will upgrade your images: Color Correction: Brightness, contrast, and white balance to make every shot look the same. Color Grading: Creative color for making it cinematic Stabilization: Software can even stabilize shaky video. Crop and Frame: Different types of media will have their respective aspect ratios. Example-16:9 is the standard one for YouTube. For Tik Tok, the ratio will be 9:16. 6.Add text and graphics Professionals will add the text overlay, titles, and lower third to the videos. How to make professional pictures: Use templates: Using the software canva or preexisting templates in Filmora saves quite a lot of time. Do not overdo or over apply special effects. The text and color are going to fit with your aesthetic given the theme. 7.Export to All Devices Export it in the highest quality, ensuring that the video plays smoothly. These are your options: Resolution: At least 1080p for most devices. Bitrate: This will be balanced with file size; YouTube actually recommends 8 Mbps for HD. File Format: MP4 is very well supported, and compression won’t degrade the quality much either.

video editing tools
Video Editing

Top Features to Look for in Video Editing Tools

Top Features to Look for in Video Editing Tools Video editing slowly lost its niche. But with the high pressure of making video content on YouTube, Instagram, and TikTok, video editing slowly transcends into a daily hub for new generations of creators. And all of these available choices that are emerging in the said industry still linger; what fits best? First, how one identifies which ones would be important and thus needed. This guide explores some of the top-rated features and how they relate to video editing applications in augmenting creativity. Why Video Editing Features Matter? All video editing software says it will convert raw footage into a final product, but few are equal. Great features do more than stretch your creative possibilities; it improves your workflow, saves precious time, and raises your confidence levels of getting some of the sought-after professional looks for you and your videos-including you, pro editors and new enthusiasts alike. Now let’s walk through the features that must be on top of your list when choosing video editing tools. 1.Friendly Interface The clean intuitive interface is one of the must-haves in such tools: it must be user-friendly and works fine for beginners. Friendly design lets you navigate through the tool and features less frustratingly, find fast such functions as trimming, cutting, and effects, and spend more time on creativity and less time figuring out how the software works. Drag-and-drop tools and workspaces make editing pretty effortless to a large extent. Examples: iMovie: It is the most elementary, user-friendly interface, and it’s clean and understandable. Filmora: This one is pretty well-balanced between simplicity and functionality-that is why many beginners like it. 2.Professional Editing Software Fundamentally speaking, an editing tool should offer all the basic functions: Trim and cut: It deletes unwanted parts of your footage. Clip merging This involves the combination of one or more clips for maintaining flow in the story. Clip splitting This is the segregation of the footage into increased frames for perfect cuts. Control Speed of Playback This can be applied in a slow motion or fast motion effect. These are the general rules of video editing in any software and you will ensure that these will become easier for you to get hold of in your software. Pro Tip: Feel how sensitive such tools are before investing in a demo of the software itself 3.Advanced features that let you think creatively to gain flexibility Basic tools are a must, but the advanced feature opens new doors to creativity. So, you need video editing software that will enable you to have the following: Multi-track editing: You can edit several layers of video and audio simultaneously. Keyframe animation: You can make certain points in your video move based on the effects you want to apply. Motion tracking: You can track graphics or text to objects in your footage. Chroma key (green screen): You can easily swap backgrounds for professional effects. Masking tools: You can mask certain parts of your video for applying the effect selectively on those areas Some examples include : Adobe Premiere Pro and DaVinci Resolve is very feature rich, so it is favourite among pros. 4.Effect Library and Templates Adding transitions and templates to your videos does wonders on quality. The best tool gives you: Pre-made transitions: seamless cuts between scenes Filters and overlays: that special atmosphere or feel in video Pre-designed intro, title, and ending screen saves you precious time. Sufficient effects library. No re-invention of the wheel in editing sessions. Some of them, like Final Cut Pro, have plugins that will help you enrich your effects library as well. 5.Audio Editing Features Audio must be as important as video in any video project. Good quality audio features will allow you to: Synchronize audio and video smoothly. Remove background noise for clear sound. Insert sound effects and background music easily. Balance the levels between clips. Make voice-overs possible directly within the software. Audio ducking is not available for professional or story telling videos. View: The Filmora audio ducking feature, it automatically damps down the background music if there’s a voiceover involved DaVinci Resolve Fairlight audio panel to hone 6.Color Correction and Grading Color correction and grading can dramatically change the mood and quality of your video. Above are the must-haves to: Brighten and contrast tweak: tweak the general look of your shot. Colors fine-tuning: adjust the color ratio to look as natural as possible. Color grading: Give your video a cinematic feel with LUTs- Look-Up Tables. Pro-Tip: Apart from these color grading tools, there’s DaVinci Resolve-that’s pretty great in painting even in free form. 7.Export Options and Formats When you are all done, you would want to make sure that you are saving in the correct format and resolution for output. Best video editing apps give all this. Multi-resolutions: 1080p, 4K, etc. Export presets to applications online like YouTube, Instagram, TikTok, and so much more Ability to set file size whilst maintaining quality Quick export At other times you can even export directly by clicking on the social media sites again a time saver feature as well. 8.Cross-Platform Compatibility Most creators use more than one device so the need to have cross-platform compatibility can never be over-emphasized. Look out for the following in these tools: Sync projects across desktop, tablet, and mobile devices. Cloud storage to make access to your work smooth. Give consistent functionality across devices. For Example: Adobe Premiere Rush and Clipchamp are leading the pack in cross-device functionality. 9.Performance and Speed Editing can be very resource-intensive. For any given performance-optimized editing software, it will present: Smooth playback: plays in full resolution without loss Fast rendering: so wait time to export reaches historical lows Hardware acceleration: it uses computer’s graphics processor to provide best results Tips for New Users Be cautious and go through demos to get the feel of exactly what kind of responsiveness the software truly offers. Preview some test edits back and forth before settling upon them finally. 10.Materials and Community Support That

Video Editing Software
Video Editing

Best Video Editing Software for Beginners

Best Video Editing Software for Beginners Video content has today become an essential medium through which people tell stories, market their products, create educational content, and amuse themselves. Whether a beginner YouTuber or a small business owner with an interest in creating memorable videos of family events, a wrong video editing software can sabotage all your projects. Keeping that in mind, the main problem often faced by beginners is that at times they are assigned to search for a tool that both is powerful as well as easy to use. Given below is the guide covering best video editing software for beginners as well as features on how to pick the perfect one according to your needs. Why Choosing the Right Video Editing Software Matters Before telling the best video editing software for beginners, let’s talk why the right one is necessary: Ease of Use: Beginners should use intuitive tools with a friendly interface that makes editing as easy as possible. Learning Curve: Some may take hours or days to master them. Choosing beginner-friendly options avoids frustration. Features and functionality: Transitions, effects, as well as the ability to edit audio are very creative in features but simple ones might do the job for the small edit needed. Affordability: A start-up artist that is limited by its budget will of course begin with a low cost or a free software. Exporting options: Exporting made easy directly to YouTube, Instagram, or TikTok makes the dissemination of material easy. Best Video Editing Software for Beginners 1.iMovie Platform: macOS, iOS Cost: Free iMovie is perfect for someone using Mac and iPhone. This is a video editing application, and anyone can do anything with it via a clean and intuitive interface. Among the benefits are: Pre-designed themes and templates to edit with ease Drag-and-drop video and audio placement with ease Transitions, effects, and titles built into the app High-quality export options; 4K is included Integration with other Apple products and software like Final Cut Pro 2.Adobe Premiere Rush Works on: Windows, macOS, Android, iOS Free, feature-limited Adobe Premiere Rush is the one especially for beginners and amateur creators. It boasts such features as: Cross-platform compatibility so you can cut anywhere. Intuitive timeline that makes cutting, trimming, and reordering clips a lot easier. Built-in templates of social media videos. Direct export into YouTube or Instagram. Color correction and motion graphics, etc. for professionals 3.DaVinci Resolve Platform: Windows, macOS, Linux Cost: free, Premium for the Studio version DaVinci Resolve is a pro tool with an amiable astonishingly free version. Some of the basic features are; Clean tabs, most importantly those with editions, color correction as well as audio mixing tabs All basic editing features fit for the new ones Advanced ability for one if they planned to increase their knowledge of things over time. There exists a free good quality; the watermark in the exports is not a major hinderer for the user. Industrial standard color grading included 4.Filmora by Wondershare Platform: Windows, macOs Price: Freely available trial version comes with watermarked exports);  one time a year; has subscription A highly usability product for new comers; very intuitive UI with respect to features very detail rich. Features present Drag-and-drop interface will make editing work very easy. Many effects, transitions, filters available in in-built resources. Library consists of many royalty free music and sound effects. Tools including motion tracking with green screening facility. Very easy means of exporting that suits all your desired resolutions at all available platforms. 5.HitFilm Express Platform: Windows, macOS Free of cost but comes with cost augmentation components HitFilm Express is perfect for those interested in learning basic editing skills and very simple effects. Some of the Key Features listed include: Free version of robust edits without watermark Library of over 400 effects and presets Tutorials to guide and support that are specifically tailored for beginners. Paid Addons to provide additional 3D rendering, and color grading. 6.OpenShot Platform: Windows, macOS, Linux Cost: Free OpenShot is an open-source video editor. It is very friendly so suitable for beginners, and the following features are featured here: User-friendly interface with drag-and-drop functionality. Unlimited layers of video, audio, or images can be added. Built-in animation and keyframe tools Basic effects, transitions, and title templates are present Really updated with an excellent community support. 7.Clipchamp OS: Windows, Web-based Price: Free (features limited), Premium Recently acquired by Microsoft, Clipchamp is the top web-based alternative for a new user. Here are some of its features: Pre-made templates for different types of videos. Timeline, which will make editing relatively hassle-free. Stock video and audio library, royalty-free. Direct export to social media sites. Integration with Microsoft 365 applications. 8.Canva Video Editor Web-basedApplication: Free (free version), Premium Another great option that the new video creator would enjoy working with is the Canva video editor, which has these features among others: There is a drag and drop interface which will take little time to know its use. Templates are mostly pre-designed for social media materials. Easy, uncomplicated tools for trimming or addition of text, and transition. Integration with all Canva graphic design aspects. Quick export options that feature all the common social sites Selecting the Best Video Editing App for Your Needs

Scroll to Top